
Stainless & glass balustrade install to stairs and landing
Customer: Mr & Mrs Hanley, Huddersfield
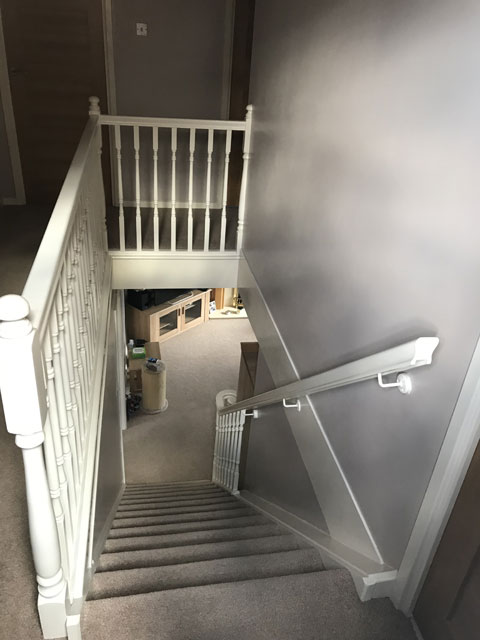
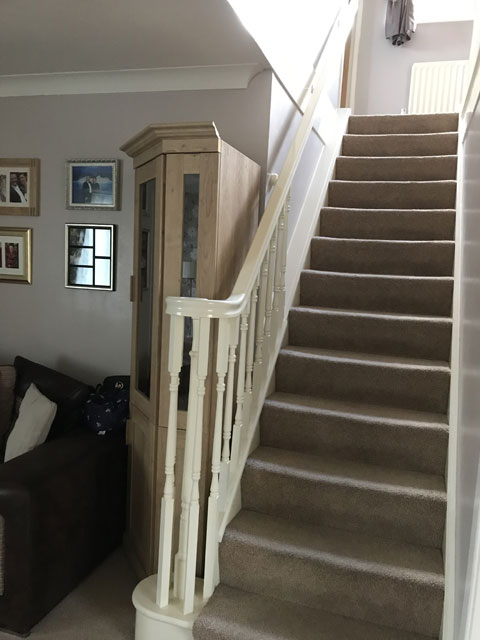
Mr & Mrs Hanley wanted to take out the old traditional wooden ‘spindle’ type handrailing they had on their internal stairs and landing area and replace it with something more modern and stylish. And was thinking along the lines of stainless steel and glazed type of handrail.
After searching for ideas on the internet for stainless steel and glass balustrade they found Global Walkway Solutions and called to discuss their project and requirements.
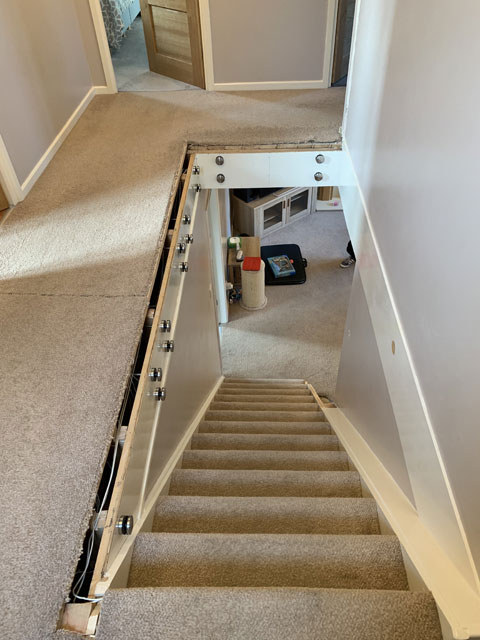
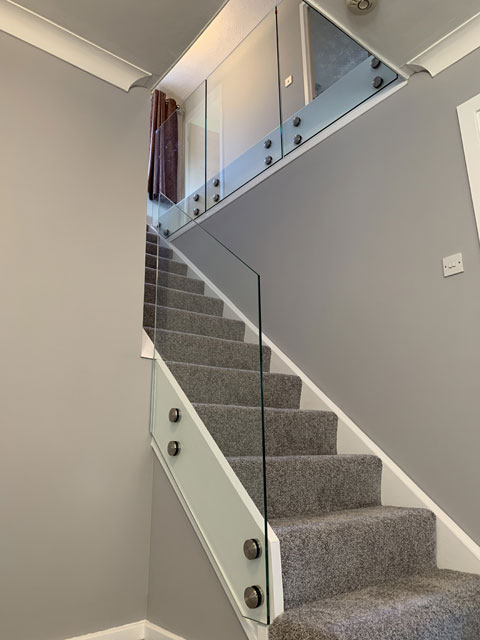
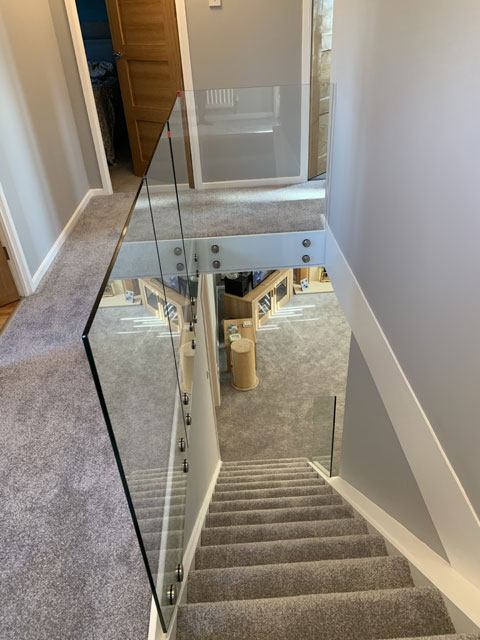
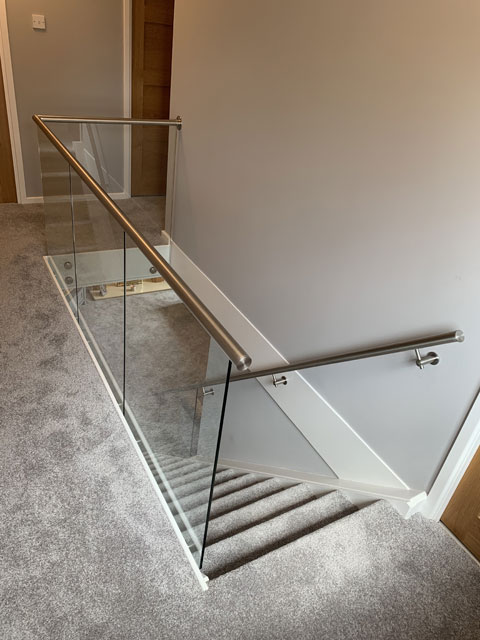
We met with Mr & Mrs Hanley to discuss the project further, and based on their requirements we put forward the idea of going for a minimalistic look without any upright posts and instead mounting the glass with glass adapters to create a more open, lighter and brighter space.
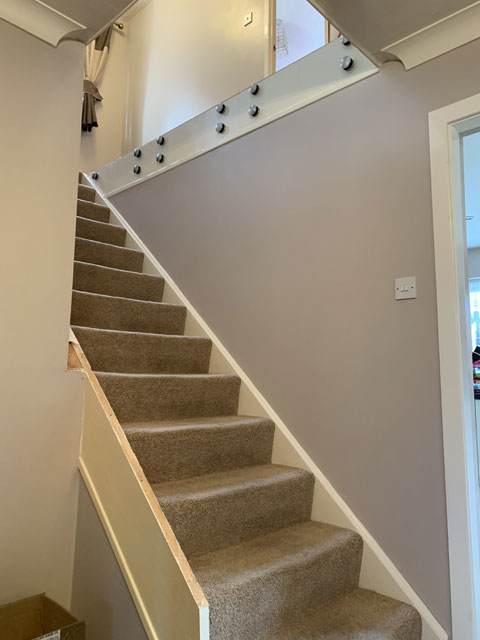
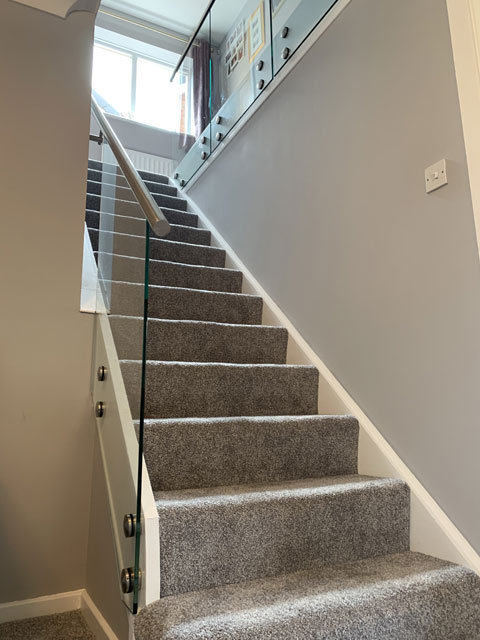
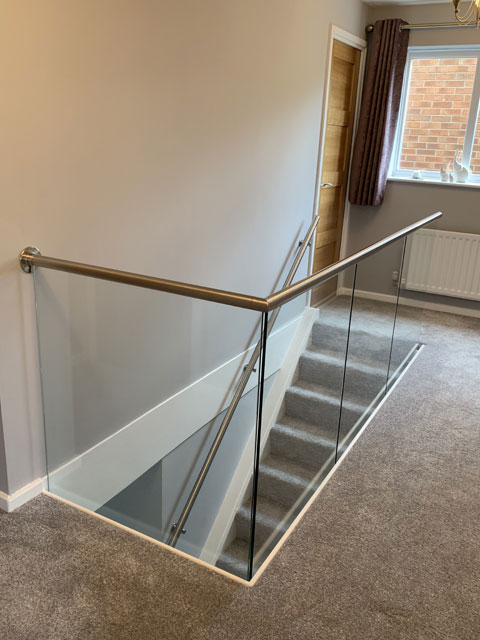
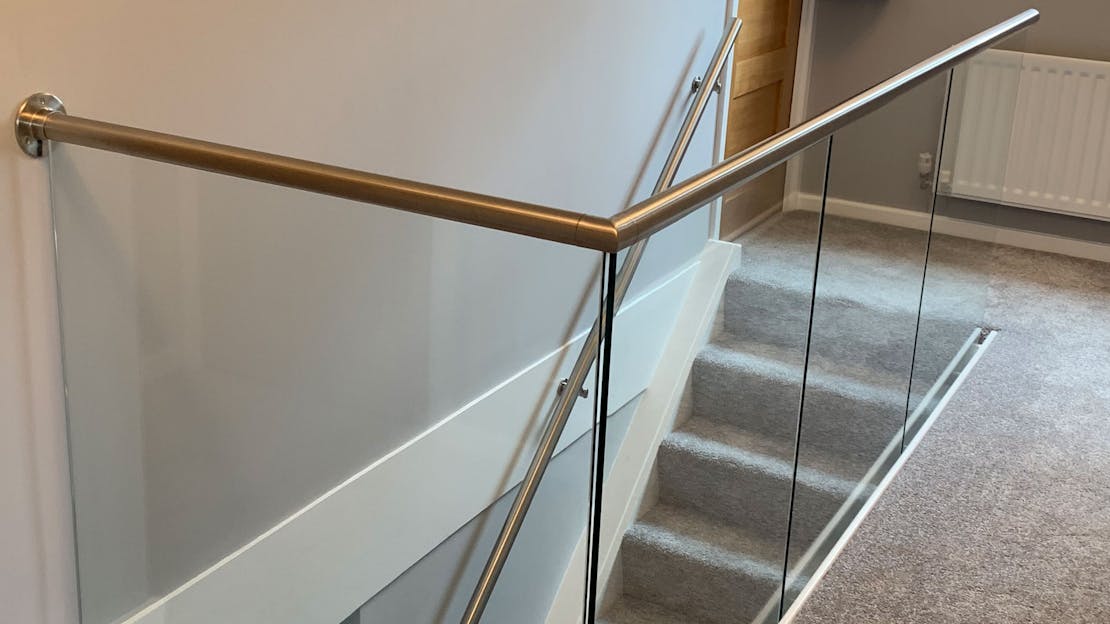
Through this consultation process it was also decided that we would use a 42.4mm stainless steel channel tube top rail to cap the top of the glass and provide more strength and stability. And we would use the same 42.4mm stainless steel channel tube as a banister rail down the stairs and to cap a small angled section of glass at bottom of stairs.
We took all necessary measurements and calculated the required materials. We then submitted the quotation to Mr & Mrs Hanley which was shortly agreed upon, after which we implemented an agreed plan of action.
Swiftly following the preparation work(removal of old ‘spindle’ type handrailing and making good), our team commenced with installation of the glass adapters to the appropriate points. Once these were in place we could get the exact sizes required for the glass infill panels and produce templates for the shaped panels, the glass could now be ordered for manufacture.
Just over a week later, once the glass was manufactured, the installation team returned to site to fit the glass and then do another measure for cutting down the 42.4mm stainless steel channel tube top rails to suit both the staircase and landing area. Finally just days later the rails were fitted and the installation was complete.
Mr & Mrs Hanley were delighted with service and the end result, commenting that it had turned out even better than they had imagined!
See the stages of construction throughout the installation process in photo’s shown here...